Introduction
Now let's trace a paper sketch and align it with the true centerline.
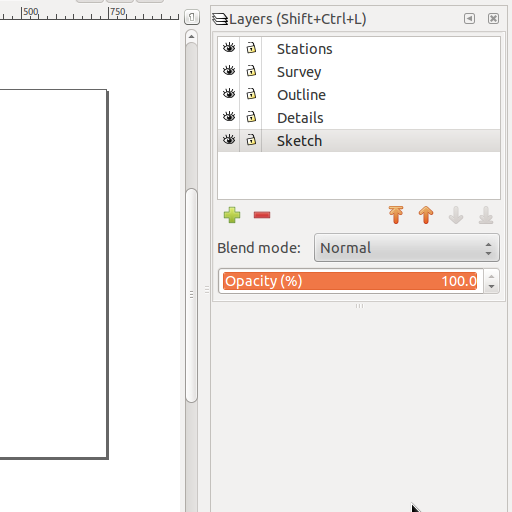
First, go to Layers / Layers ... and create layers for this tutorial. We need at least three, but five will be even better. Name them in the following way: 1. Stations, 2. Survey, 3. Outline, 4. Details, 5. Sketch.
Import the centerline
Select the Survey layer as active. Go to File / Import. Select a Survex 3d file to import. For a start, you can use the file from this tutorial: paper2.3d.
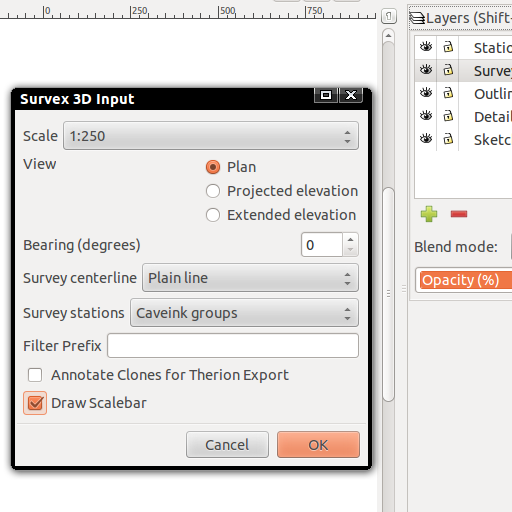
The import options window for 3d files should appear on your screen. Select your scale (1:250 for the example files), choose Plan, make sure Bearing is 0. Set Survey centerline: Plain line and Survey stations: Caveink groups. The Filter prefix should be left empty. Uncheck Annotate clones and check Draw scalebar. Click Ok.
Now we have our reference centerline in place. You should not put any other objects in its layer. To be certain about that, lock the layer (click on the padlock icon next to Survey in the layer list).
Import the sketch

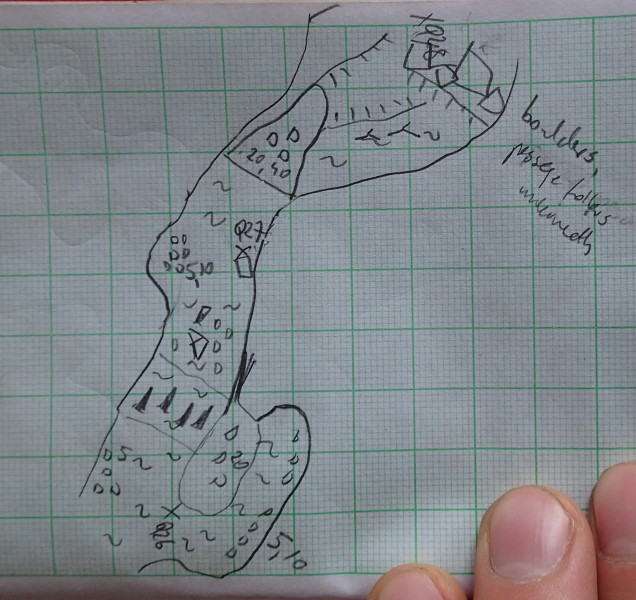
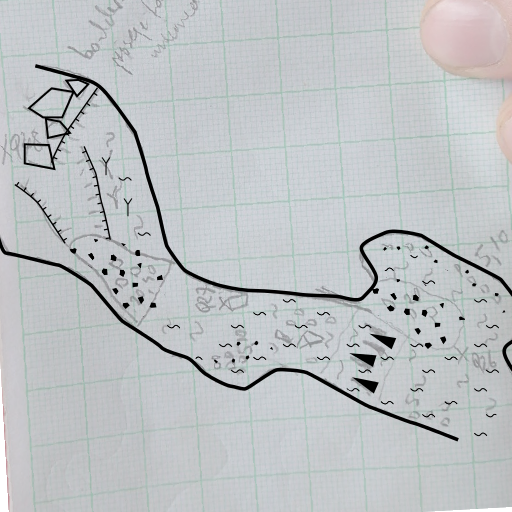
Now we switch to the Sketch layer. Again, go to File / Import and find your sketch (example: paper2.jpg).
Import options will appear. Be absolutely sure to select Image import type: Link. Click OK.
Rough alignment
Now rotate and scale the sketch so that it is (very) rougly aligned to the centerline. Make sure you always scale the image uniformly (ie. with Ctrl held during the scaling).
Hide the centerline (click on the eye icon in the layer list next to Survey) and lock the sketch (click the padlock icon near Sketch). Use a slider in the layer list to adjust opacity of the Sketch layer so that the sketch is faded.
Trace
Draw a clean copy of your sketch in Outline and Details. Use symbols, pattern fills and other Caveink features as needed.
Mark where the stations are
To morph the drawing to the real centerline, you need to tell Caveink where the particular stations are located on your drawing. First, reduce opacity of the Outline and Details layers or hide them, so that they do not distract you from this task.
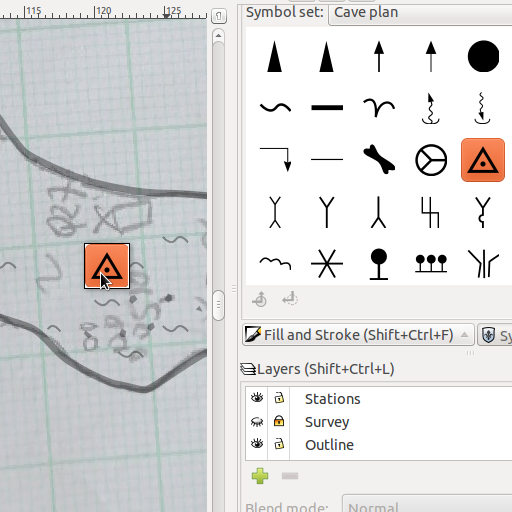
Now Switch to Stations layer. Open Object / Symbols and select the Cave plan symbol set. Drag a surveying station symbol to your centerline. Place it on one of the stations marked on the sketch.
Label and group stations with labels
Label your station by using Inkscape's text tool (F8). The station name must exactly match the relevant name from your Survey layer. For example, in the example files all stations are in fact prepended with paper2. and that prefix must also appear in the station label.
In order for the morphing to work, it is essential to have every station groupped with its label. Select both the station and the label and press Ctrl+G.
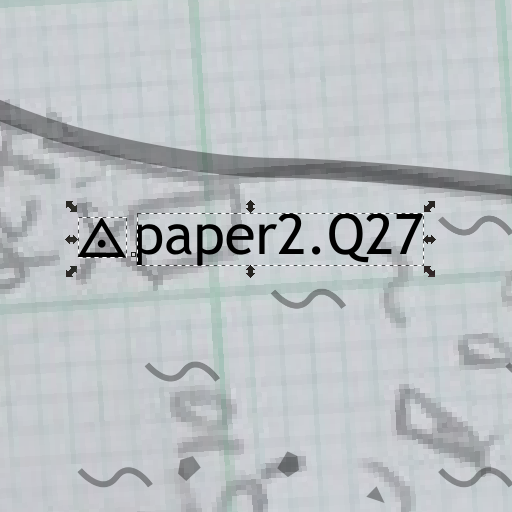
Label all stations
Mark and label all the other stations on your drawing. You can simply duplicate the group as necessary (copy/paste or right click and Duplicate) and move the copies where the other stations are located on the sketch. To update the labels, switch to text tool (F8) and click on a label text to edit it.
Run the extension
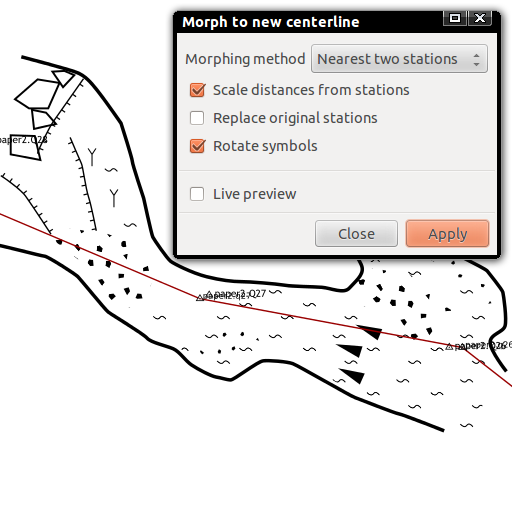
Now we are ready to run the morphing extension. Make sure that in addition to the Stations layer, all the layers to be morphed are visible (ie. Outline, Details). You can hide the sketch though.
Select the Survey layer as active and make it visible. It is very important that this layer is active while running the morphing feature.
Now click Extensions / Speleo / Morph to new centerline.... Select Morphing method: Nearest two stations. Tick Scale distances from stations and Rotate symbols. Uncheck Replace original stations. Click Apply.
Done!
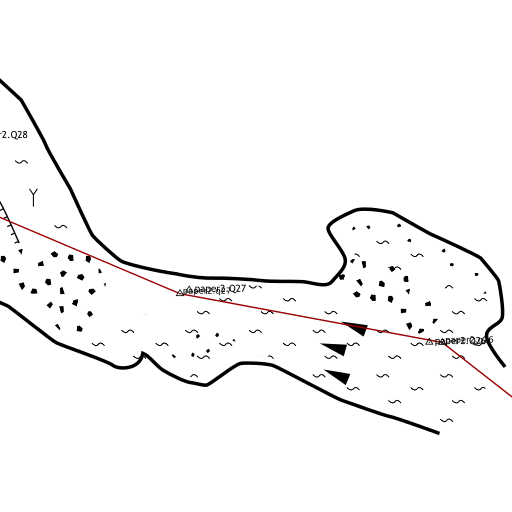
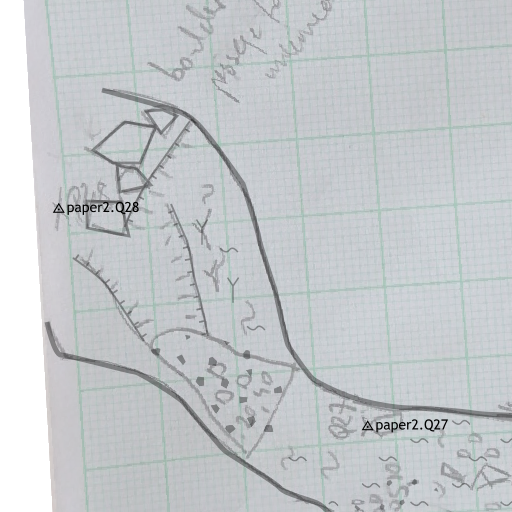
Your drawing is now adjusted to the actual centerline!
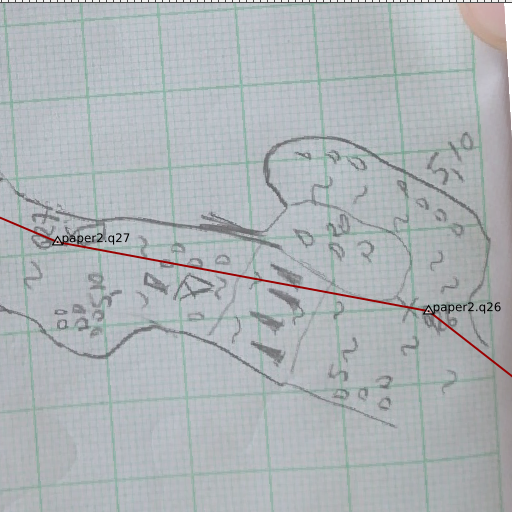
Of course you will get best results with good drawings that only need little adjustments - ie. that are to scale and have well represented angles. Rough drawings will always need some reworking - note for example the artifact opposite the Q27 station on the nearby screenshot.