The problem
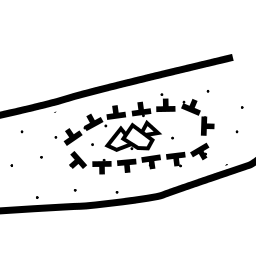
Rocks on cave plans come in different kinds. There is angular debris and pebbles. There are small rocks, large rocks and boulders. Last, but not least, there are specific and unspecific rocks.
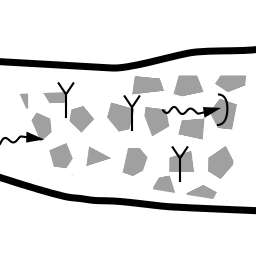
Suppose my cave is filled with mud all the way and has three small rocks sitting under a tall chimney. I would note the exact position of these rocks and place exactly three rock symbols on my cave map, even trying to draw them in proportion to their relative size and depict their shape. These are specific rocks - the symbol on the plan is strictly related to a particular rock in the cave. Probably I would not even be using the stock rocks.
On the other hand, if all the cave is filled with debris, I usually do not care about particular rocks. The rock symbols on the plan only indicate that there is a lot of debris and do not symbolize individual rocks that you can pick and compare with the symbol.
Rocks are dangerous
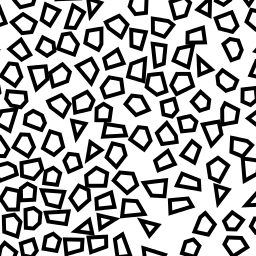
You can cope with unspecific rocks in a couple of ways. One of them is to copy rock symbols around many times. It is in fact not a good way, because it takes a lot of time and will slow down inkscape on your drawing in the long run. This is because you can easily end up with hundreds of distinct rock objects, each with its own shape and rotation, that will take a lot of effort for your computer to render.
Lets' do it in a better way, using pattern fills.
Mark your area
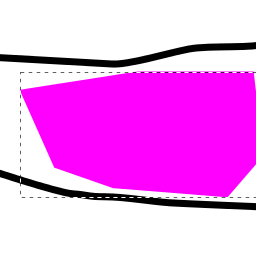
First, define a closed shape defining the area to be filled with rocks. You can fill it with color for the time being, to see better.
Choose your pattern
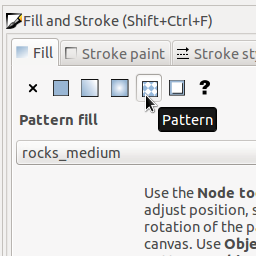
Now go to Object / Fill and stroke. Select Fill tab and click on the Pattern icon at the top of the tab. Select rocks_medium as the filling pattern.
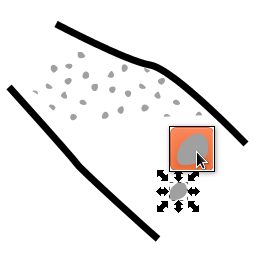
Adjust rock size
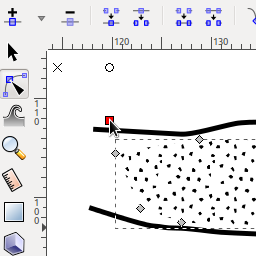
Suppose you actually needed smaller rocks. Activate the Node tool (press N) and select your area. Note that in addition to regular node handles (marked points that you can use to alter your shape), there should be an extra set of three handles somewhere on your canvas - a cross, a circle and a square. Beware, they can sometimes display in an unexpected place.
These handles control the pattern fill. Now hold Ctrl, grab the square handle and move it around. Your rocks will neatly change sizes.
Pattern stacking

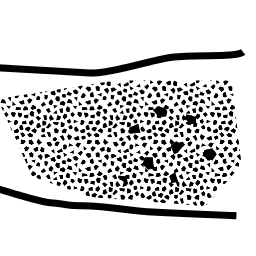
What if in the middle of your area there is larger debris along with the small rocks? No problem! Draw another shape on top of the original area and apply pattern fill again. Adjust the inner area using Node tool, so that the rocks in there are bigger.
Density
Note that each pattern comes in three densities: sparse/medium/dense. You can overlay two sparse areas to get somewhere in between sparse and medium.
Outlined rocks
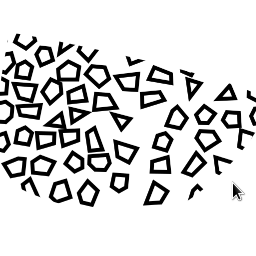
As you surely noticed, the rocks have a solid fill, rather than being an outline with a white fill. This is because of a small disadvantage of pattern fills: the pattern is always sharply cut at the defining shape edges. As you can see on the nearby illustration, sharply cut outlines do not look nice.
Gray patterns
Black, solid filled rocks can make your other symbols indistinct. Because of that, all of the rock patterns have a gray version. Consider using them instead.
Unfortunately, it is difficult to specify a custom fill color for the pattern.
Gray rocks
If you decide to use pattern fills and go for the filled-in rocks, you probably will be happy to stay consistent with this convention when placing specific rocks on the drawing.
Obviously, it also makes more sense to just draw a couple of symbols for unspecific rocks in very small areas, rather than fill them with a pattern. It can be difficult to get your pattern right for just two, three or four rock symbols that you want appear in a particular place.
To save time, you can simply use Cave rocks - Gray symbol set from Object / Symbols. After you place a rock, rotate and scale it as you see fit.
Other patterns
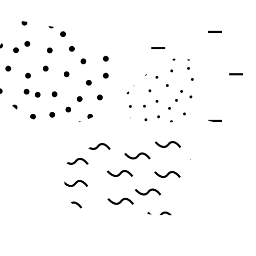
Note that there are also patterns for filling areas with silt, clay, sand, gravel and pebbles. They are all used in a very similar manner.
Pattern template
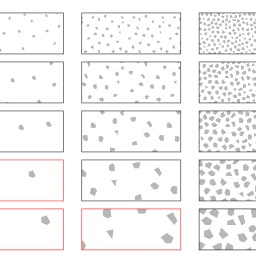
It can be a little frustrating to get the pattern right, especially with the debris patterns. If you don't mind switching to another Inkscape window from time to time, you can invoke File / Templates... and select Cave symbols palette, which is a SVG document containing - among other useful things - dozens of rectangles with various pattern fills.
Once you find a pattern that suits you there, simply copy the rectangle to clipboard, switch to your cave plan, select a shape and invoke Edit / Paste style (Ctrl + Shift + V)
Note that copying patterns around with Paste style will make your document large over time, as Inkscape in fact duplicates patterns instead of referencing them many times. Use Extensions / Speleo / Symbols / Repair file and then File / Clean up document to remove redundant copies after you finish your drawing.
Enjoy the patterns!