The problem
Of course you can split big drawings into separate pages manually, even putting each of the pages in separate files. However, you can end up with a lot of work if you need to update your map - for example, add some newly discovered passages that span many pages. It is even worse if you prepared the pages so that they slightly overlap for the reader's convenience.
With Caveink, you can keep working on the original drawing independently of the final layout and make all the pages refer to it, so that they update automatically as the drawing is edited.
Preparations
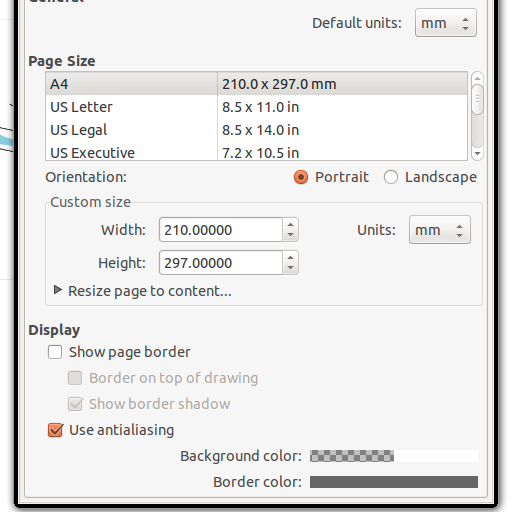
Before invoking Caveink functions, we need some preparations. We are going to keep everything in one file. Since the SVG format does not support multiple pages per file, we are going to completely ignore the SVG page area. In order not to be distracted by the page frame, go to File / Document properties and uncheck Show page border.
Layer structure
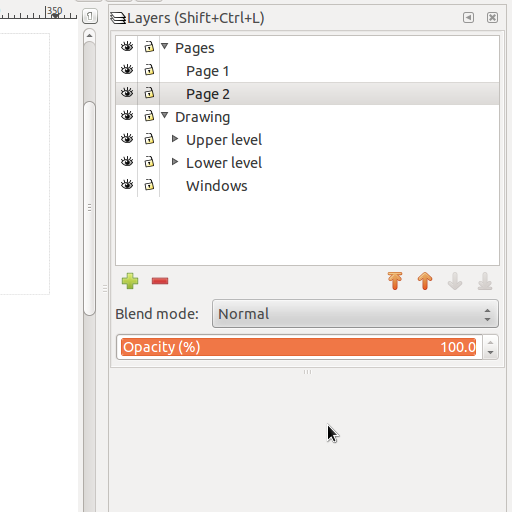
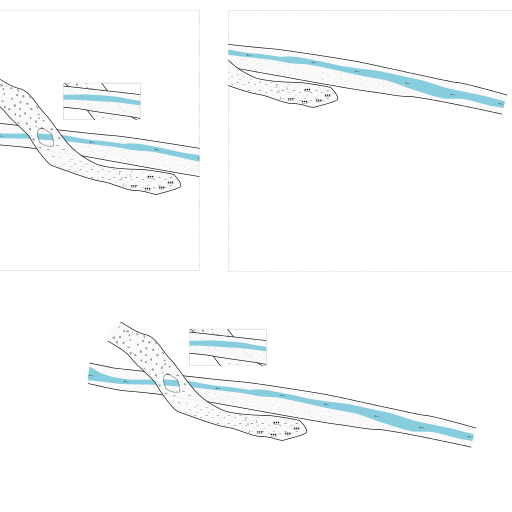
In order for this trick to work, you have to keep the original drawing in its own layer. Let's name it Drawing. This layer should not have any objects directly in it, but rather contain all the contents in sub-layers (such as, for example, Outline, Details etc.).
On the other hand, we are going create a separate layer for each page that we want exported. The pages can be groupped together in another layer (say, Pages).
If it does not sound clear, see the example file (pages.svg).
Draw a page frame
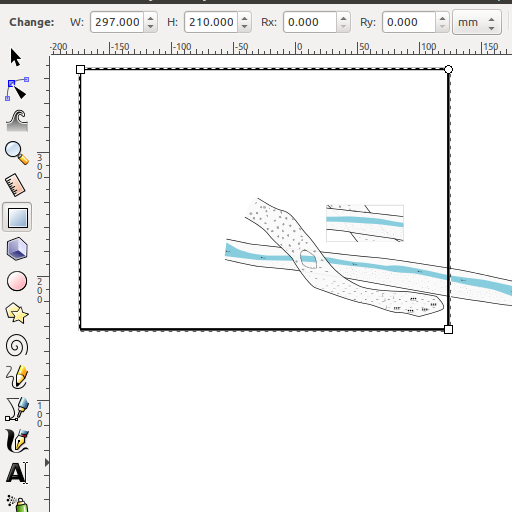
Go to the Drawing layer. Draw a rectangle over your drawing denoting what the first page should contain. You can use the controls just below the Inkscape menu bar to configure exact rectangle dimensions, for example 297x210 mm (which is A4 landscape). Go to Object / Fill and stroke and style the rectangle. Remove fill completely and assign a plain stroke style (eg. 0.5 mm, black).
Run the extension

With the rectangle selected, go to Extensions / Speleo / Layer tricks / Make a window. Select Clone: Current layer and Layer opacity: Clone and keep linked. Tick Keep clipping path. Click Apply.
Move to an extra layer
Move your newly created page view to make sure it worked. You should have a cloned section of the drawing inside your rectangle. Move it somewhere away from the drawing so that it does not get in the way.
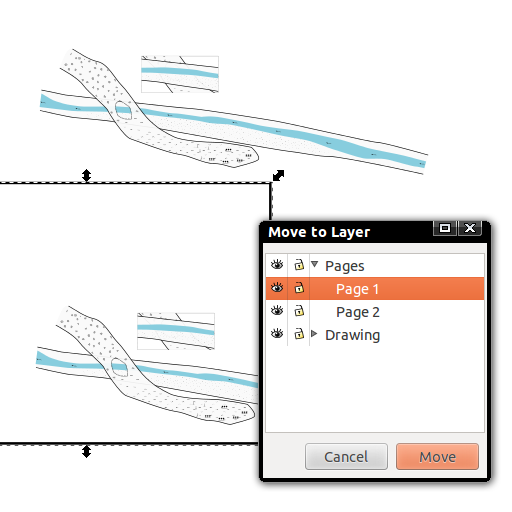
Now create a layer to contain this page (outside of the Drawing layer!), for example Page 1. With the rectangle selected, right click on it and select Move to layer. Choose Page 1 as the target layer.
Repeat for other pages
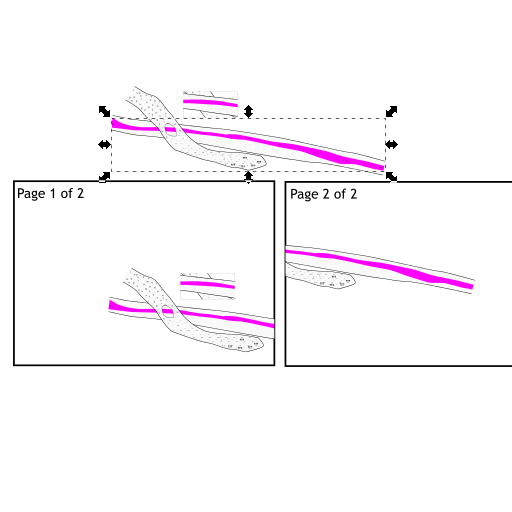
Repeat for subsequent pages. Decorate your page layers with page numbers, a legend etc. Note that if you change anything in the Drawing layer, the contents of your pages will automatically update.
Exporting pages to PDF
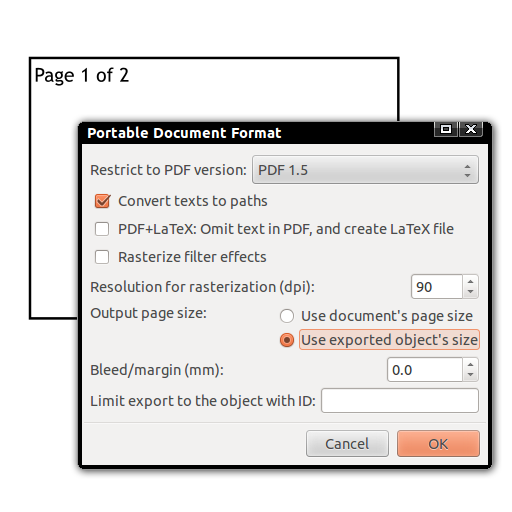
To export an individual page into a PDF file, simply make this page the only visible layer. Then select File / Save a copy... and choose a target PDF file. An options dialog will appear. Select Output page size: Use exported object's size.
In a similar way, you can use File / Export PNG image... to export your pages into raster files.