 Deutsch verfügbar (hier klicken)
Updated: December 2023. Examples for Inkscape v1.3.
... auch auf Deutsch verfügbar (hier klicken)
Why so? The template file contains several useful definitions: symbol shapes, fill patterns (e.g. debris, snow) and line symbols (pits, steps, ceiling morphology). Of course, you can draw these elements from scratch each time, but why bother? It is quicker to use the ready-made ones!
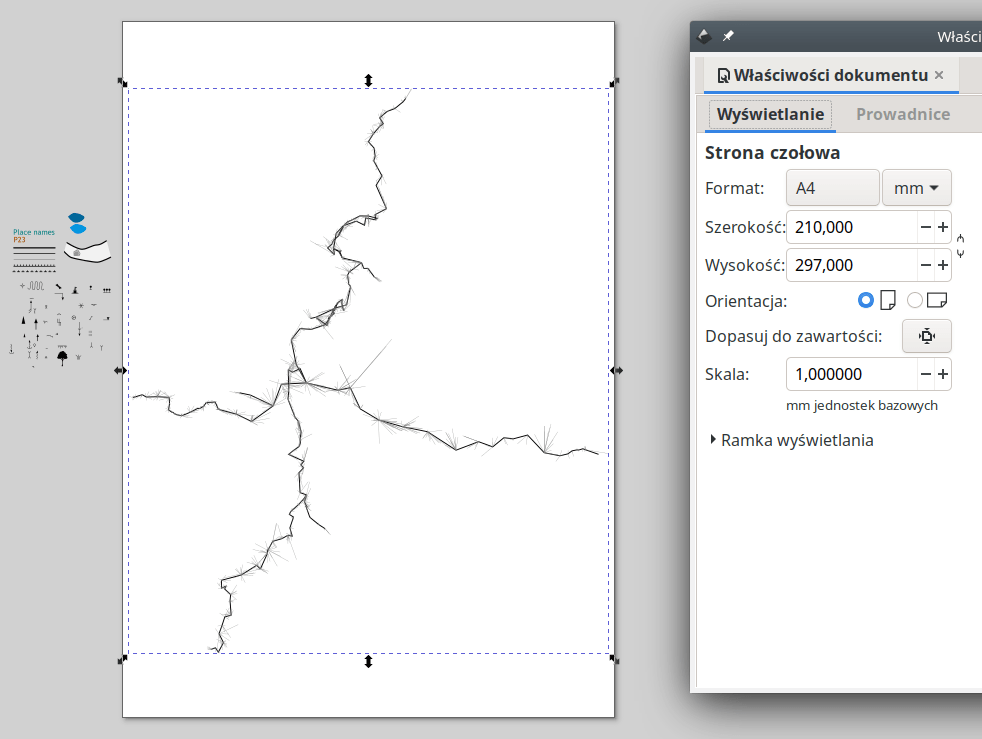
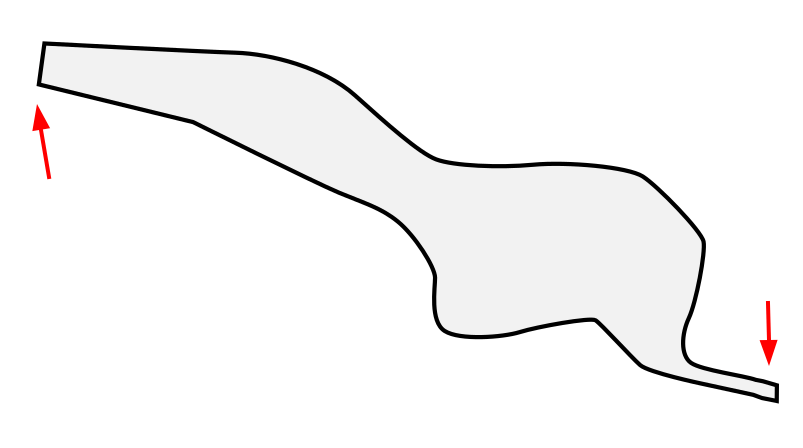
I always start by importing the survey centerline. I adjust the page size to fit it and place it in a good spot (... so that it's at a suitable distance from the page margins). The survey polygon is my reference point – it determines the scale and north orientation. Its constant presence while working on the drawing makes all the difference between just scribbling on the screen and creating a real cave map. I align all my work on the plan with the survey. Therefore, after importing and placing it on the page, the survey polygon should never be scaled, rotated or moved (unless all other objects referenced to it are also moved). This is helped by locking layers.

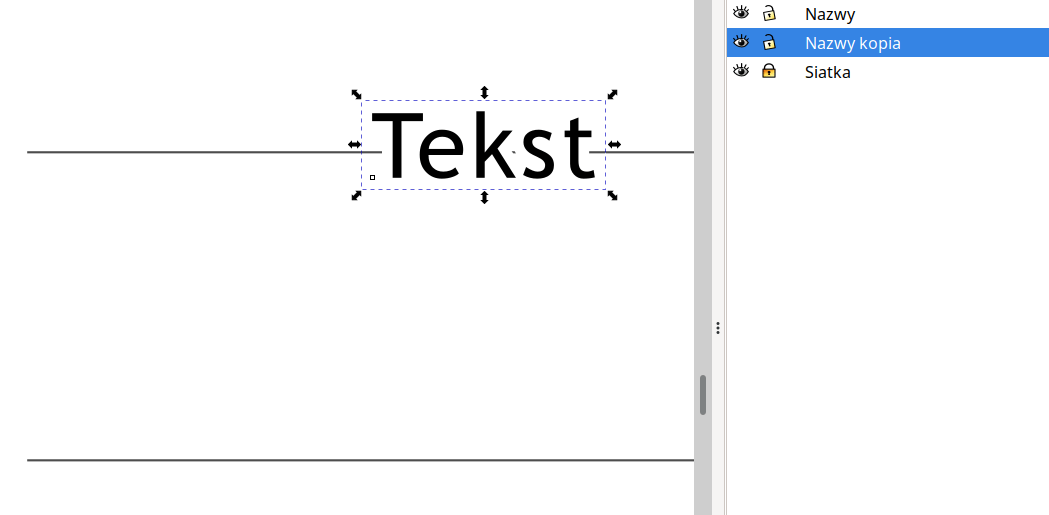
All right, but how do you actually load the survey polygon? First, you need to export it from your survey processing software in a format that Inkscape accepts. SVG is best. For example, in the Survex package, an SVG file can be easily generated using the File / Export function in Aven. And now, the important bit! Do not simply use File / Open to import this file into Inkscape! Instead, open the Objects / Layers and Objects... window, consciously select a layar (eg. Survey), and then use the File / Import function! When asked about the Import Type, select Add SVG image as editable object in current file.
First, you need to convert them to a format recognised by Inkscape, such as JPG, PNG or SVG. And then, importantly, just like with the measurement sequence, do not load these files via File / Open. Instead, select Sketch as the active layer and use File / Import. This will attach the sketch to the document you are currently working on instead of opening it in a new window.
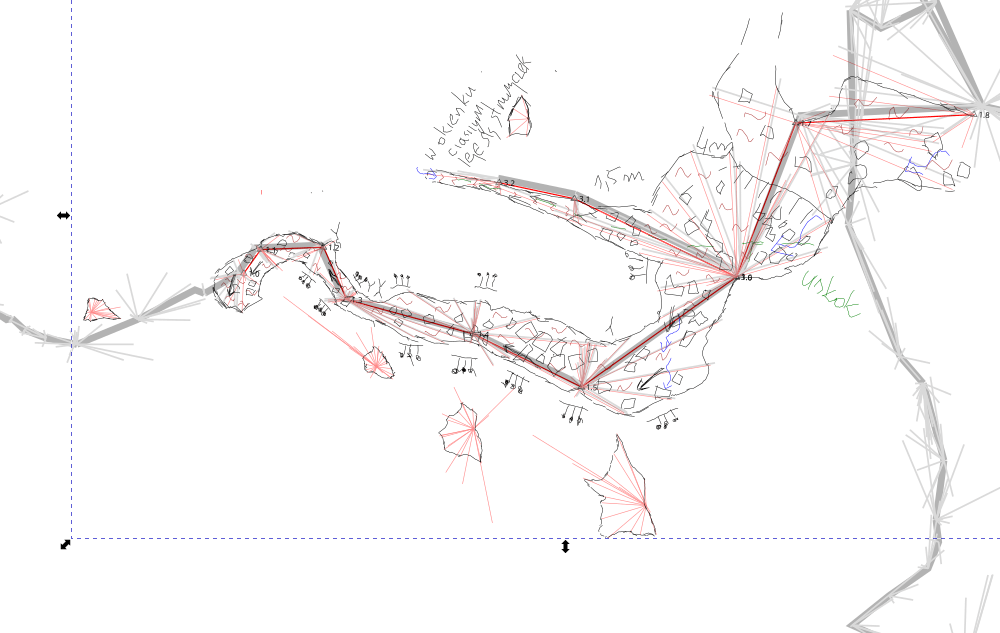
A sketch is just a sketch. An accessory drawing. It is not as sacred as the survey centerline. You can bend, scale and move the sketch freely to make it fit the survey polygon. It is quite possible that your survey polygon has been corrected for magnetic declination by your processing software – but your sketch might have not been! Therefore, it is not surprising that sketches sometimes need to be gently rotated to match the survey polygon.
It doesn't really matter that much. Layers are definitely worth using. Don't be afraid of experimenting to find what best works for your project. Should the lakes be on a separate layer? And should these naughty lines and arrows indicating the plane of cross-sections and the directions of view be on a separate layer? Both too few and too many layers lead to messiness – the only difference is when this messiness will come back to haunt you in the form of additional, pointless work.
As a starting point, you can try the layer layout defined in the template file, which works well for me. You may also find that it's a bit too much to begin with, which I wouldn't be surprised to hear. In my opinion, the absolute minimum is: Outline, Details, Survey, Sketch.
Speaking of layers: during the first few dozen hours of working with the Inkscape, everyone notoriously places objects on the wrong layers. It's definitely worth knowing two Inkscape functions that can easily correct such mistakes: Edit / Paste in Place and Move to Layer... - the latter is available from the menu that appears when you right-click on an object.
By all means, do not draw by hand with the Pencil ("Freehand") tool. Use the Pen tool, i.e. Bezier curves. Digital representation of these ‘Bezier’ curves usually needs much less information than hand-drawn lines. When processing graphics with many lines (which is typical for cave maps), the amount of data to process has an impact on the performance of the graphics software. Typically, it will be significantly better for drawings input as Bezier curves. In addition, Bezier curves generally scale more smoothly, should you for example fancy to magnify a fragment of your map.
To draw this kind of curve in Inkscape, select the Pen tool (keyboard shortcut B) and use your mouse to mark the points (also called nodes) that will define the curve. A single left-click on your screen causes the line to be continued as a straight segment. Clicking and holding the left mouse button lets you bend the line into a curved shape.
Finish drawing the line by pressing ENTER or (in case of closed shapes) by clicking on the node you started the drawing from. The position of the nodes and their type, i.e. straight line, symmetrical curve (smooth transition through the node), asymmetrical curve (corner at the node) can be changed at any time for a particular line using the curve editing tool (keyboard shortcut N).
Lines can be exteded easily by selecting them using the object selection tool (S) and only then selecting the Pen tool (B).
The line style (thickness) can be changed using the Object – Fill and Stroke dialog window (Shift+Ctrl+F). Enter dashed lines as a single curve with the appropriate line style (in the Fill and Stroke dialog), rather than as several separate lines!
I use the following settings: wall outline: 0.5 mm, floor details and steps 0.28 mm, minor floor details 0.1 mm. Water colour (RGBA) 0083d1ff, water layer opacity 50%. Why 0.28 mm? It could just as well be 0.25 mm, what's the difference? But in case I feel like exporting to a raster file instead of PDF, 0.28 mm is exactly 1 pixel at 90 DPI
It is definitely worth knowing the Edit / Paste / Paste Style (Ctrl+Shift+V) function. It allows you to easily copy styles and colours between objects. First, copy (Ctrl+C) the object that is to be the style template (which has the desired line style or fill colour), then select the objects that are to look identical and use Paste Style. With this trick, you don't have to constantly be looking at Fill and Stroke and pondering over thicknesses.
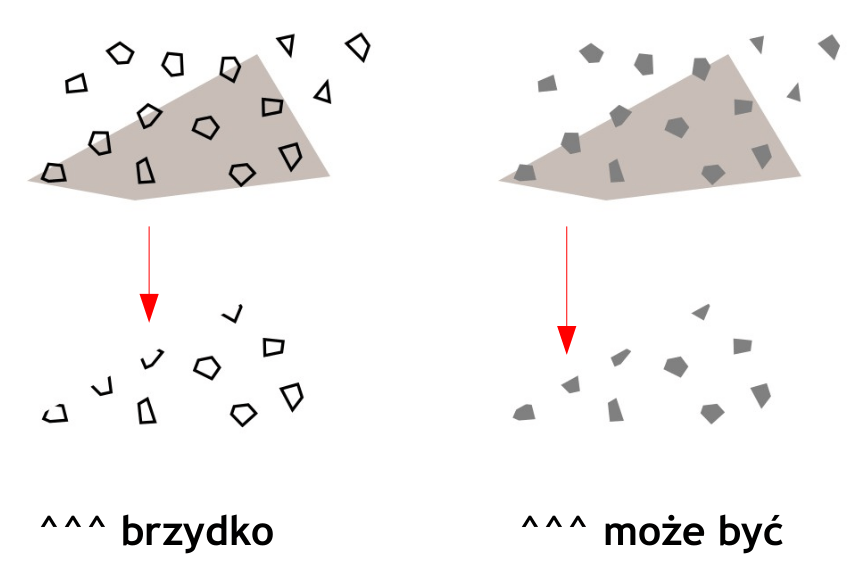
Use the Object / Symbols function. A palette of symbols will open, from which you can drag and drop into the document. As a rule, symbols should not be scaled. If they appear too large or too small, you are probably drawing your plan at the wrong scale.
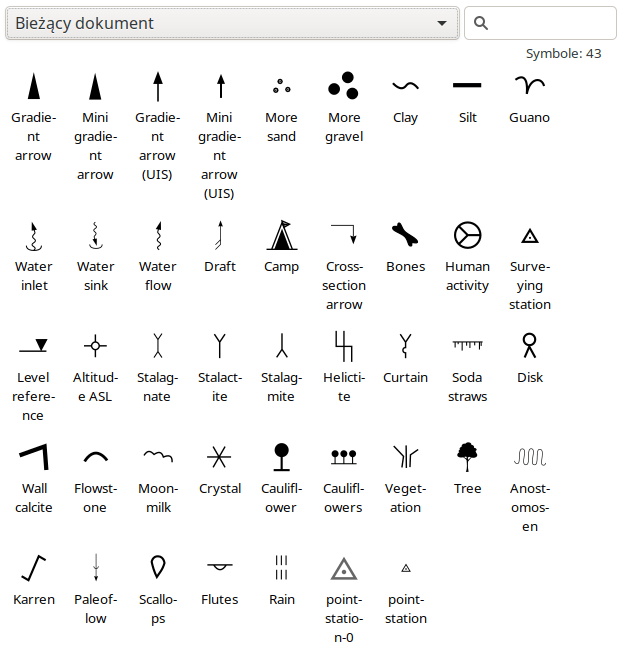
Good to know: When moving a symbol, holding the left mouse button, press the space bar (but do not release the left mouse button!). The symbol will be copied to the current position of the mouse cursor. This is a convenient way to insert several symbols next to each other. Just don't go into the hundreds!
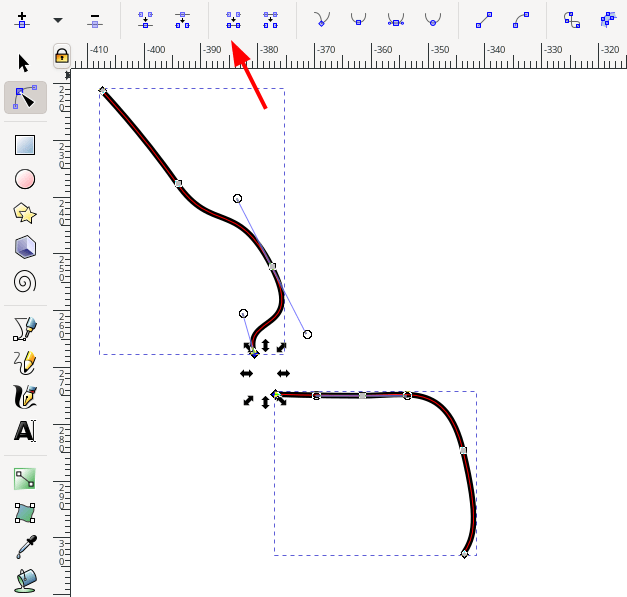
Draw a line that will mark the edge of the step. Just a simple line – straight or curved, long or short, but without any special embellishments. Then select a previously prepared step line. You can find such a line, for example, outside the page area in the template file. Copy it to the clipboard (Ctrl+C). Return to your new shiny line and use Edit / Paste ... / Paste Style, and then - important - Path / Paste Path Effect. To perform these two operations efficiently, it is worth learning the hotkeys. In my Inkscape, they are: Ctrl+Shift+V and Shift+7.
You can generate the dripline (ceiling morphology) symbol in exactly the same way. To reverse the direction of the steps or driplines, use the Path – Reverse function with the step (or dripline) line selected.
The thresholds are ‘simulated’ using the ‘ruler’ effect built into Inkscape. You can customize them using the Path / Path Effects ... dialog window.
Draw the area to be filled (just like any other line – with the Pen tool – except that this time it will be a closed curve). Open Object / Fill and Stroke. In the Fill tab, select the icon labelled ‘Pattern’. From the fill patterns, select the debris you like. Note that there are two different debris densities to choose from.
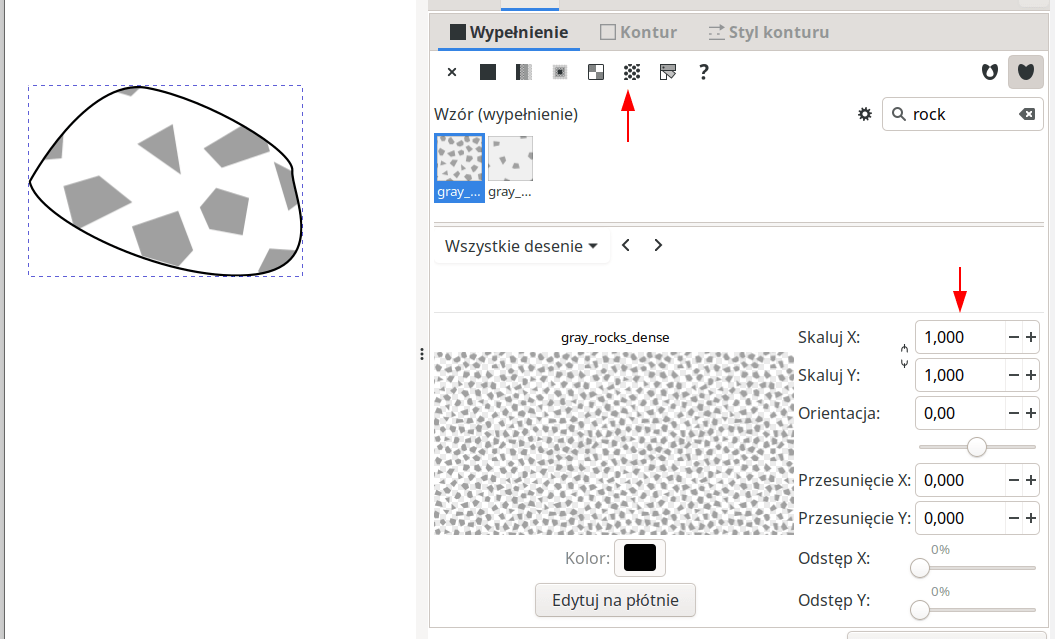
To change the size of the rocks, adjust the values in the Scale X and Scale Y fields (... use two identical values!). In the Stroke paint tab, disable the stroke line.
Why are the rocks grey? Good question for a geologist... Why to make them grey on the maps as well? Unfortunately, it is not a matter of aesthetics. Only grey rocks (without edge outlines) can be easily scaled. Such rocks also ‘cut off’ well at the edge of a filled area. I used to draw rocks with borders, but I came to the conclusion that this way of representing stones is very labour-intensive. You should definitely avoid drawing each rock separately (except, of course, when you have a very specific, distinctive rock in mind!) - the more objects in a graphics application, the slower it will run!
Path – Difference. Particularly useful for cutting out islands in lakes. After drawing a lake (as a closed, filled curve), draw an island (also as a closed, filled curve). Make sure that the island is ‘on’ the lake (if necessary, use Object – Raise to top or Object – Lower to bottom). Select both the lake and the island, and use Path – Difference.
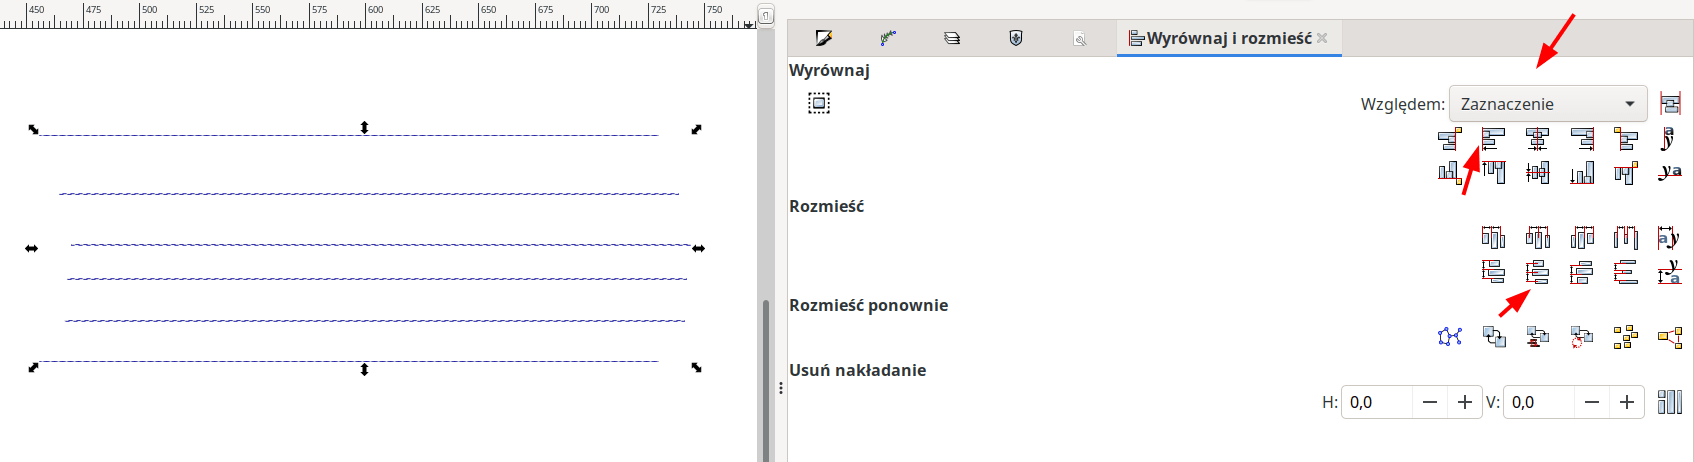
Object – Align and Distribute – opens a dialog window with a range of options useful for building grids or scalebars. For example, distributing objects at equal intervals, aligning the bottom edges of objects, etc.
Edit / Clone / Create Clone - it is often worth using this option instead of the usual Copy & Paste. A clone of an object can be freely moved, rotated, and scaled. The only thing you cannot do is interfere with the composition of the object, which always mirrors the original. This has one very important advantage: if you change the original, all clones will change. Importantly, a copy of a clone is also a clone (of the same object) - therefore, you only need to remember about clones when copying for the ‘first’ time. Clones can always be converted into independent objects (Edit / Clone / Unlink clone). All conventional symbols inserted from the symbol library are such clones. More about the advanced use of clones: in a separate document
The Ctrl key plays an important role in mouse operations. If you hold it down:
while moving an object – the object will only move horizontally or vertically
when drawing a line – the next segment of the line will be drawn at an ‘even’ angle (0, 90, 45, 22.5 degrees)
when scaling an object – the object will be scaled maintaining the proportions between width and height (usually very important in cave maps...)
The Shift key is very important in the selection tool – it lets you to select more than one object.
Grids are a good way to illustrate the tools for precise moving and positioning in Inkscape. To draw a grid, do the following:
In a similar way, we draw vertical grid lines.
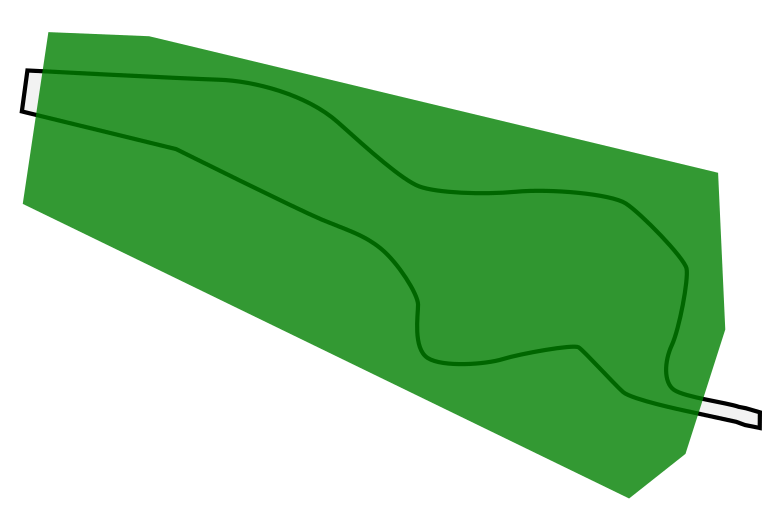
It is convenient to have a colour fill 'inside' the cave. This helps when presenting overlapping passages (we set the fill of the higher corridor to semi-transparent, and sometimes that is all you need!). Also, it is easier to see where the pillars are in the cave. And with the fill, you don't have to interrupt the grid lines.
The problem, however, is that colouring this space between walls requires a lot of work. You basically have to redraw the outline of the cave corridors. Outline and fill cannot be represented with a single object, because we seemingly cannot tell Inkscape not to draw a fragment of the outline (where the entrance/end of the cave is).
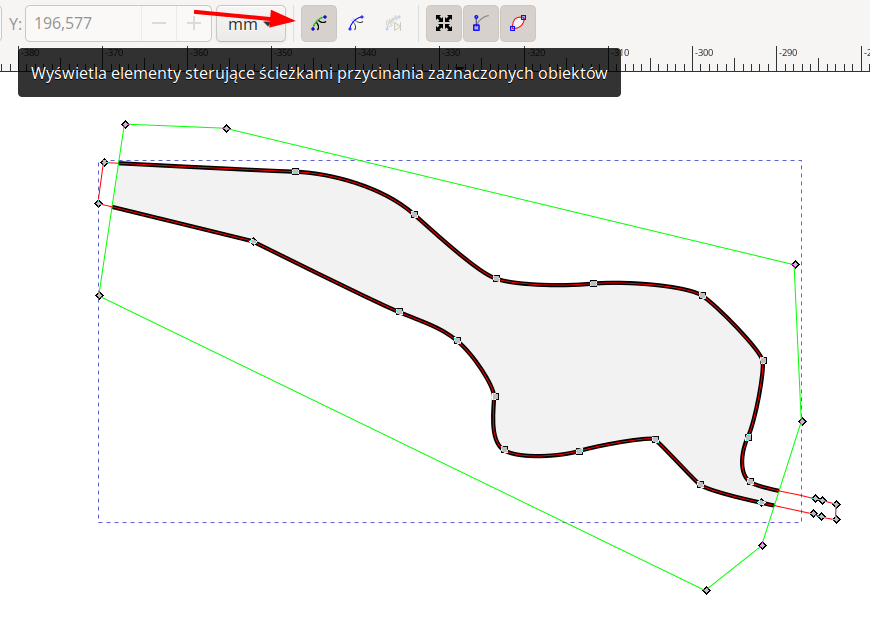
One way to solve this problem is to use clipping. We draw the cave as a single filled object and then draw a shape that will mask out the parts with undesired outlines.
Select the drawn fragment of the cave and the drawn mask, and choose Object / Clip / Set. The applied clipping mask can be easily edited using the node editing tool, provided that the icon Show clipping path(s) of selected objects has been clicked before.
The entire cave can be assembled from numerous clipped elements with different contour styles.
Note: This technique is worth knowing, but it is not universally applicable...
The names of the cave parts overlap the grid and it looks bad. What can we do? The easiest way is to copy the layer with the captions (right-click on the layer name and select Duplicate layer... ), place the copy below the layer containing the inscriptions, then select everything in the your copy (Ctrl+A) and set the text stroke (e.g. white, 1 mm) in Fill and Stroke. It is also worth to adjust the opacity of this new layer.
Consider the extra layer created in this way completely temporary. If it is necessary to update/change the names, simply delete this layer and create a new one (after making changes to the texts in the main text layer).
Entering groups: To edit an object inside a group, you do not need to ungroup the group. Simply double-click on the group to ‘enter’ the group and freely select and edit its elements, as well as add more objects to the group. To enter a group within a group, double-click again. To 'exit' the group, double-click on an empty area of the drawing or use the select box on the bottom toolbar. The biggest risk of using this function is unintentionally creating objects inside a group (instead of at a higher level) when you forget to ‘exit’ the group.
Editing multiple nodes simultaneously: Not everyone knows that you can edit multiple objects simultaneously using the node editing tool. Add subsequent objects to the edit mode by clicking with the Shift key pressed. The node editing tool is also a great way to select an object deeply embedded in groups (e.g. to change its style) - using node editing tool (even if you do not intend to change nodes!) you don't need to enter the group, then the group within the group, then the group of groups, etc. to reach such an object.
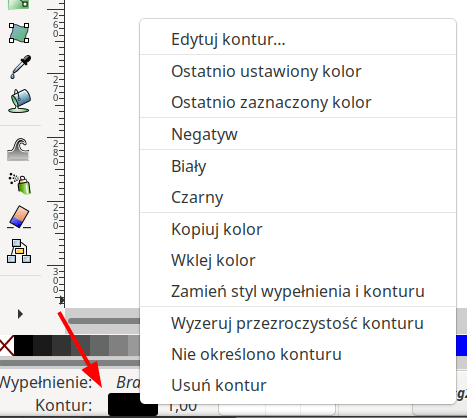
Copy colour, paste colour: In addition to the very useful Edit / Style / Paste Style function (which also works for multiple selected objects!), it is also worth knowing about the menu available under the right mouse button on the rectangles indicating the current fill colour and outline.
This is an advanced technique that can save you a lot of work when drawing maps containing ‘offset views’ (e.g. intersecting passages). It is worth reading about it: here (use your favourite AI translation service). Note that the text applies to Inkscape version 1.1. The technique also works in Inkscape 1.3, but the Inkscape interface has evolved somewhat and it takes a little effort to figure out where to find the functions discussed there. The most important tip: Inkscape 1.3 no longer has an Object/Objects window – all the functions available in it have been moved to the Layers window, which is now called Layers and Objects!